How to add an exclusion in Windows Defender
An exclusion is a place where your antivirus will not scan any files.
In Windows Defender, you can add an exclusion for specific Files, Folders, File Types and Processes.
Since in most situations your goal will be to prevent the antivirus from deleting any files from a specific game, an exclusion will be added for a Folder
To avoid problems, it is recommended to create a dedicated folder for your games, and add an exclusion to it. This way, no game installed within that folder will have files deleted by your antivirus, compromising its operation.
Follow these steps to add an exclusion:
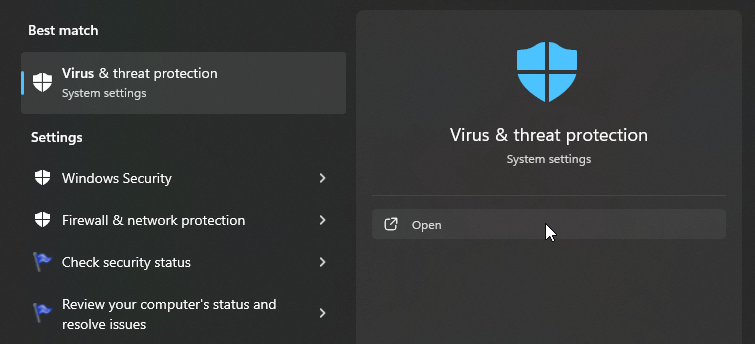
Open the Start menu and search for Virus & threat protection:
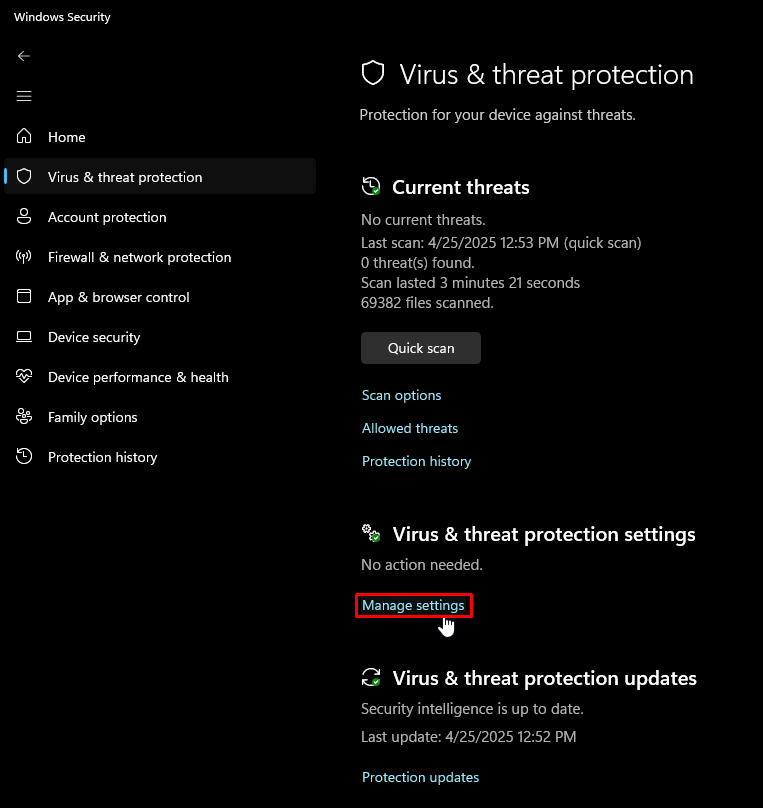
Click on Manage settings:
If you use another antivirus, the Manage settings option will not appear in this tab, but rather the antivirus that you have installed on your computer. In this case, you will need to open it and add an exclusion within it.
This guide only covers Windows Defender, each antivirus has a different interface.
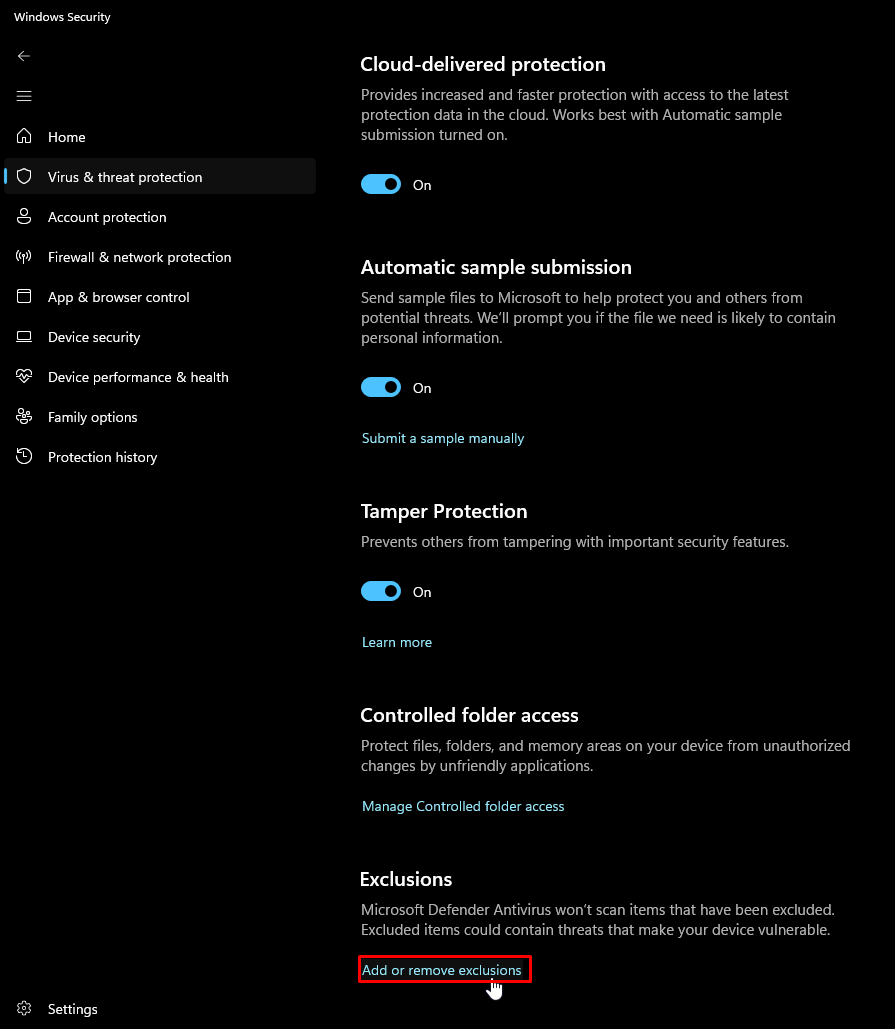
Scroll down and click on the Add or remove exclusions option:
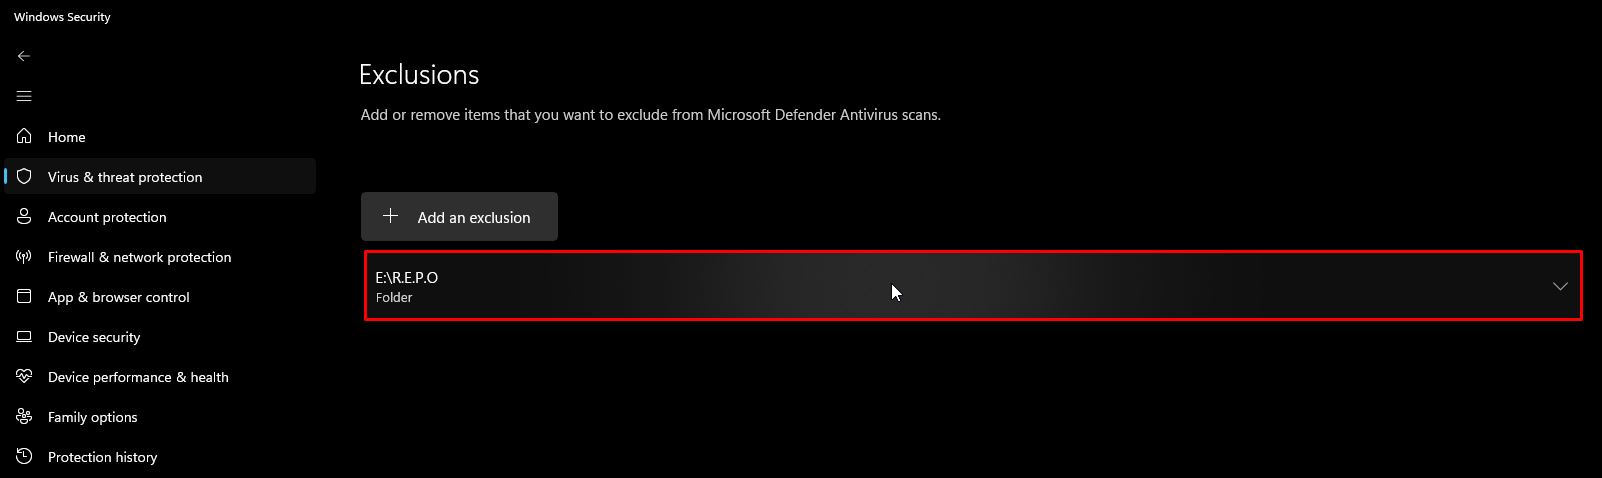
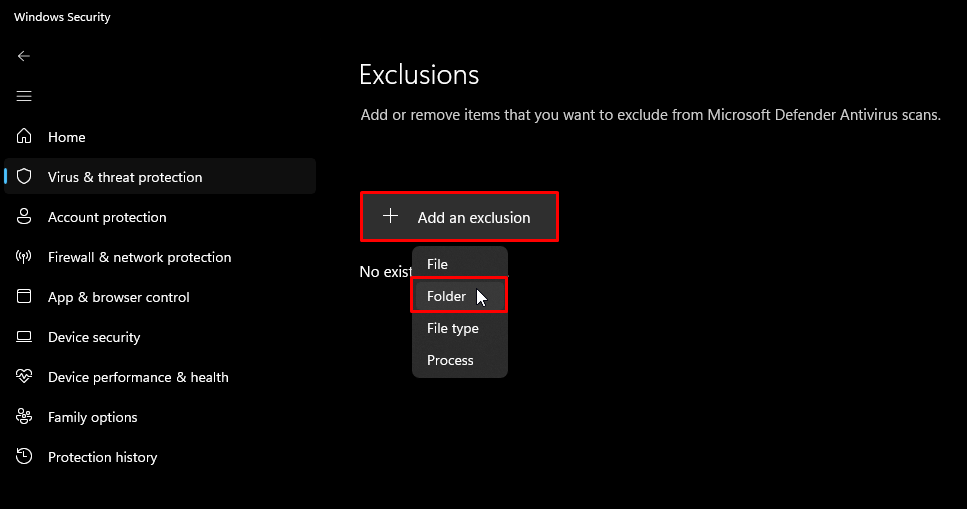
Click on the Add an exclusion > Folder button, and select the game folder:
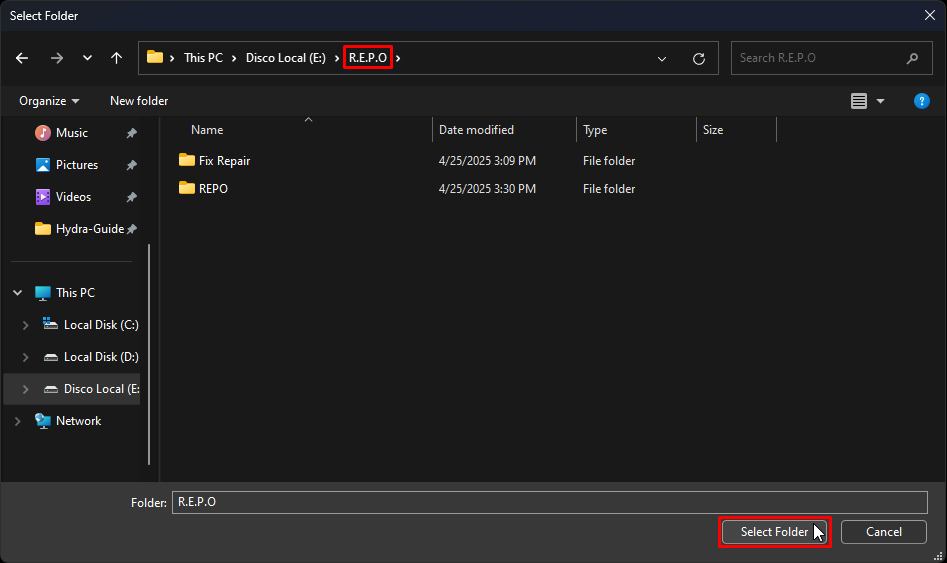
In Online-fix games, it is recommended to add an exclusion for the first folder of the game, which holds both Fix Repair and the folder with the game files itself.
After that, the folder will be excluded.